


 english
 français
 Deutsch
 Italiano
 Русский
 Español
 português
 Nederlandse
 ελληνικά
 日本語
日本語
 한국
한국
 العربية
 हिन्दी
 Türkçe
 indonesia
 tiếng Việt
 ไทย
ไทย
 বাংলা
বাংলা
 فارسی
فارسی
 polski
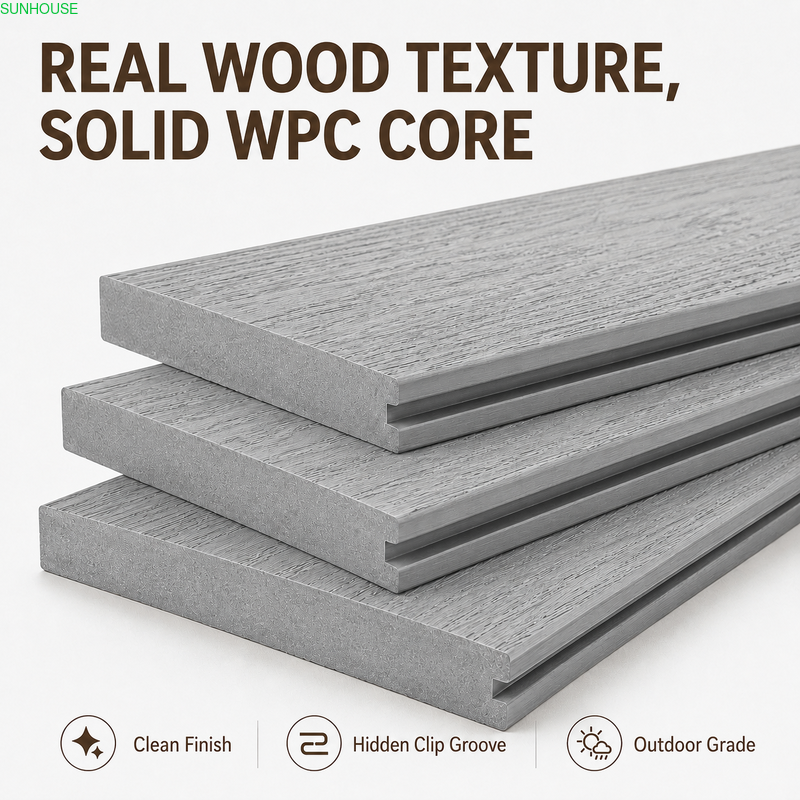
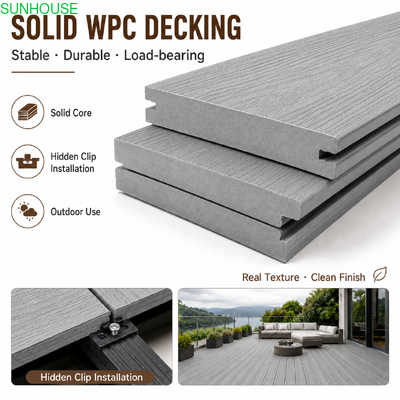
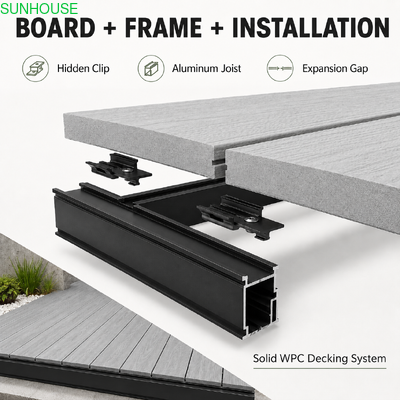
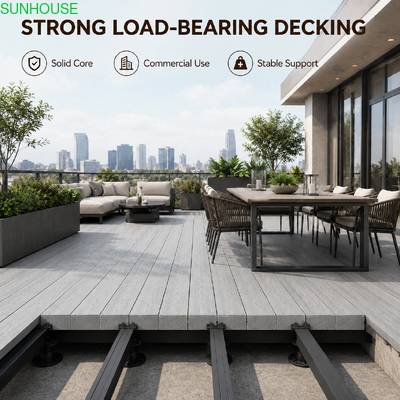
Solid WPC Decking Installation System Joist Spacing And Expansion Gap Guide
The long-term performance of solid WPC outdoor decking depends on more than the decking board itself. Joist material, support spacing, clips, screws, board-end support, drainage, ventilation and expansion clearances all affect whether the finished deck remains level and stable.
Many common problems—including bowing, excessive deflection, loose boards, uneven joints and standing water—are caused by an unsuitable installation system rather than one isolated product defect.
Before bulk purchasing, buyers should confirm the complete decking profile, structural substrate, joist layout, fixing accessories, installation temperature, movement gaps and drainage design.
1. Treat Solid WPC Decking As A Complete System
A professional installation should be designed as a complete system rather than purchasing decking boards separately from the substructure and accessories.
| System Component | Main Function | Buyer Confirmation |
|---|---|---|
| Solid WPC Decking Board | Creates the finished walking surface | Confirm profile, effective width, length, weight and side-groove dimensions |
| Joist System | Supports the decking and transfers loads to the substrate | Confirm material, dimensions, spacing, fixing and structural capacity |
| Hidden Clips | Secure boards and control side gaps | Verify compatibility with the decking groove and project environment |
| Screws | Fix clips, boards or joists to the supporting structure | Confirm length, head type, corrosion resistance and substrate compatibility |
| Starter And Finishing Clips | Secure the first and final decking boards | Confirm whether dedicated edge clips are required |
| Fascia Or Edge Boards | Finish exposed deck edges and conceal the substructure | Confirm movement clearance and fixing details |
2. Inspect The Structural Substrate Before Installation
The decking system should be installed over a stable, load-bearing and properly drained substrate. Decorative decking should not be used to correct a structurally weak or actively moving foundation.
- Check the concrete slab, steel structure, timber frame or pedestal system for structural stability.
- Confirm that the substrate can carry the complete dead and live loads.
- Repair significant cracks, settlement or loose surface materials.
- Identify the direction in which water should drain.
- Confirm the finished deck height and access requirements.
- Check door thresholds, drains, walls and fixed equipment.
- Coordinate concealed pipes, cables and inspection access before installation.
3. Choose The Correct Joist Material
Joists may be manufactured from treated timber, WPC composite, aluminum or other project-approved structural materials. Each option has different strength, movement, fixing and durability characteristics.
| Joist Type | Possible Advantage | Main Purchasing Consideration |
|---|---|---|
| Treated Timber Joist | Familiar construction method and easy screw fixing | Confirm treatment, moisture condition, straightness and local durability requirements |
| WPC Joist | Compatible appearance and moisture-resistant composite structure | Check structural capacity and whether it is approved as a load-bearing joist |
| Aluminum Joist | Stable, straight and suitable for controlled commercial systems | Confirm profile thickness, screw type, corrosion environment and structural support |
| Steel Framing | May provide high structural capacity for engineered projects | Confirm corrosion protection, fastening details and separation from incompatible metals |
| Adjustable Pedestal System | Allows deck-height adjustment and access to services below | Confirm pedestal spacing, joist support, wind conditions and perimeter restraint |
4. Understand Center-To-Center Joist Spacing
Joist spacing is normally measured from the center of one joist to the center of the next. The correct spacing depends on the exact decking profile, board thickness, installation direction, expected load and acceptable deflection.
1Decking Profile
Wider, thinner or differently formulated boards can require different support spacing.
2Expected Traffic
Residential patios and heavily used commercial terraces may require different support designs.
3Installation Direction
Diagonal decking generally crosses joists at a longer effective span and may require closer support.
4Temperature Conditions
Warm decking may become more flexible, making correct joist support particularly important.
5. Why Excessive Joist Spacing Causes Problems
Increasing the distance between joists may reduce substructure cost, but it can create long-term performance problems.
| Possible Problem | How Excessive Spacing Contributes | Visible Result |
|---|---|---|
| Excessive Deflection | The decking spans too far between supports | Soft or springy feeling underfoot |
| Permanent Sagging | Repeated loading and heat exposure stress the unsupported board area | Uneven deck surface |
| Loose Clips | Board movement transfers additional force to fixing points | Noise, movement and changing gaps |
| Cracked Side Grooves | Excessive board movement loads the clip channel | Reduced fixing security |
| Uneven Butt Joints | Board ends are inadequately supported | Raised or loose end joints |
6. Adjust Joist Spacing For Diagonal Installation
When decking is installed diagonally across the joists, the effective unsupported distance between supports increases. The joist layout may therefore need to be closer than for boards installed perpendicular to the joists.
- Provide the proposed installation angle to the supplier.
- Confirm the reduced support spacing required for diagonal installation.
- Check the layout around borders and feature patterns.
- Add support beneath short triangular cuts near the perimeter.
- Avoid leaving narrow cut pieces with insufficient fixing points.
- Include the additional joist quantity in the project calculation.
7. Support Every Board End Correctly
The end of each decking board should rest on suitable support. Unsupported ends can move, lift or break under foot traffic.
Single Board End
The board end should be positioned over a reliable joist or approved support point.
Butt Joint
Two board ends meeting together usually require separate fixing positions and sufficient support.
Perimeter Board
Edge boards and picture-frame borders require dedicated perimeter support.
Stair Tread
Front and rear tread areas should be supported according to the approved stair detail.
8. Use Double Joists At Butt Joints Where Required
When two decking boards meet end to end, each board may need its own clip or screw location. A single narrow joist may not provide sufficient room for both fixing points and the required end clearance.
| Butt-Joint Requirement | Reason |
|---|---|
| Separate Support For Each Board End | Reduces competition for one fixing point and improves end stability |
| Required End Gap | Allows temperature-related length movement |
| Individual Clips Or Screws | Prevents one fastener from controlling two independently moving board ends |
| Drainage Below The Joint | Reduces debris and water accumulation at the board ends |
| Alignment Control | Helps keep adjacent board ends level |
9. Understand Side Gaps Between Decking Boards
Side gaps help control board positioning and support drainage, ventilation and debris removal. In many hidden-clip systems, the clip shape determines the nominal side gap.
- Confirm the installed gap created by the selected clip.
- Check whether the gap remains consistent along the complete board length.
- Do not force boards together more tightly than the system allows.
- Remove debris that may block clips or prevent full board engagement.
- Check the gap after several boards have been installed.
- Confirm whether special spacers are required for face-fixed areas.
10. Calculate End Expansion Gaps
Solid WPC decking can expand and contract along its length as temperatures change. End gaps should be selected according to the decking formulation, board length, installation temperature and expected service conditions.
| Condition | Possible Movement Consideration |
|---|---|
| Long Decking Board | Can create more total end movement than a shorter board |
| Cold-Weather Installation | Additional expansion may occur when the decking becomes warmer |
| Hot-Weather Installation | The board may contract when temperatures later decrease |
| Dark Fully Exposed Color | May reach a higher surface temperature under strong sunlight |
| Fixed Wall Or Column | Movement space must remain between the decking and the fixed boundary |
11. Maintain Perimeter Clearance
Decking should not be tightly trapped between walls, columns, curbs, door thresholds or other fixed structures. Perimeter clearance allows movement and helps drainage and cleaning.
- Check clearances at walls and building façades.
- Maintain space around columns, posts and fixed equipment.
- Coordinate fascia boards so they do not restrict deck movement.
- Keep drainage openings free from rigid sealants and debris.
- Confirm the detail around door tracks and threshold systems.
- Use removable covers where maintenance access is required.
12. Choose Hidden Clips That Match The Side Groove
Hidden clips secure the decking while controlling board spacing. The clip dimensions must match the profile's side groove.
| Clip Feature | What Buyers Should Confirm |
|---|---|
| Clip Width | Controls the nominal gap between adjacent decking boards |
| Clip Thickness | Must fit inside the side groove without excessive looseness or force |
| Clip Material | Plastic, stainless steel or another project-approved material |
| Screw Hole | Should hold the screw securely without splitting or excessive deformation |
| Groove Engagement | Should secure the board while allowing the intended installation behavior |
| Environmental Suitability | Confirm performance for coastal, poolside, humid or chemically exposed areas |
13. Select Screws For The Joist Material
The screw must be suitable for both the clip system and the joist material. A screw designed for timber may not perform correctly in aluminum or steel framing.
- Confirm whether the screw is intended for timber, WPC, aluminum or steel joists.
- Check the required screw length and thread design.
- Use suitable corrosion-resistant material for outdoor exposure.
- Confirm whether pilot drilling is required.
- Avoid overtightening and deforming the clip or decking groove.
- Check whether the screw head interferes with the next board.
- Review coastal and poolside corrosion requirements separately.
14. Do Not Over-Tighten Hidden Clips
Over-tightening may deform plastic clips, damage side grooves or prevent the decking system from accommodating normal movement.
| Over-Tightening Result | Possible Installation Effect |
|---|---|
| Clip Deformation | Uneven side gaps and reduced holding performance |
| Groove Damage | Cracking or crushing around the fixing channel |
| Restricted Movement | Additional stress during temperature changes |
| Uneven Board Level | One board edge may be pulled lower than the adjacent board |
| Installation Difficulty | The next board may not engage correctly with the clip |
15. Plan Drainage Before Installing Joists
Drainage should be designed before the joist layout is finalized. Joists should not create barriers that trap water beneath the decking.
- Identify the direction of water flow across the substrate.
- Position joists so they do not block drainage paths.
- Provide drainage breaks or supports where required.
- Keep leaves, packaging and construction debris out of the substructure.
- Maintain access to roof drains and inspection points.
- Avoid installing decking directly in continuously standing water.
- Confirm how water will escape at perimeter fascia boards.
16. Provide Adequate Ventilation Below The Deck
Ventilation helps reduce heat and moisture accumulation beneath the decking. Low-clearance decks and enclosed perimeter details require careful planning.
Low-Level Deck
Requires clear drainage and airflow paths because the space beneath the boards is limited.
Rooftop Deck
Should maintain access to drains, waterproofing and service points.
Enclosed Fascia
Perimeter boards should not completely block required ventilation or drainage.
High-Heat Location
Additional airflow may help reduce heat accumulation below dark, sun-exposed decking.
17. Coordinate Joist Direction With Decking Direction
Decking boards are generally installed across the supporting joists. The joist direction should be planned together with drainage, board length and the desired visual layout.
| Decking Layout | Joist Planning Requirement |
|---|---|
| Straight Parallel Decking | Joists normally run perpendicular to the decking boards |
| Diagonal Decking | Closer support and additional perimeter framing may be required |
| Picture-Frame Border | Add perimeter joists beneath the border boards |
| Herringbone Pattern | Requires a detailed support grid under frequent board ends |
| Mixed Board Direction | Install blocking or additional joists under every direction change |
18. Install Picture-Frame Borders Correctly
Picture-frame borders create a clean perimeter appearance but require additional framing and separate movement planning.
- Add continuous support beneath the border board.
- Support the ends of the field boards where they meet the border.
- Maintain the required joint clearance between the border and field boards.
- Confirm whether the border is face-fixed or clip-fixed.
- Check screw positions and edge distance.
- Plan drainage below the perimeter detail.
- Avoid allowing the fascia to lock the border board in place.
19. Plan Stair And Step Installation Separately
Stair treads, nosings and risers experience concentrated foot traffic and require a dedicated support detail. A standard deck-board layout should not automatically be copied onto stairs.
| Stair Component | Installation Requirement |
|---|---|
| Tread Board | Provide support at the front, rear and any required intermediate positions |
| Nosing | Use an approved edge profile with limited unsupported projection |
| Riser | Confirm framing, ventilation and fastening method |
| Side Edge | Use fascia or another approved finishing detail |
| Slip Performance | Review the selected surface texture and stair-edge visibility |
20. Avoid Direct Installation On Unstable Ground
Decking joists should not be installed directly over soft soil, loose sand or unstable fill without a properly designed support system.
- Prepare a stable and compacted base.
- Use approved concrete supports, pedestals or structural framing.
- Prevent joists from sitting continuously in soil or standing water.
- Check settlement risk across the complete deck area.
- Provide weed and drainage control where required.
- Confirm local structural and ground-preparation requirements.
21. Store And Acclimate Decking Before Installation
Solid WPC decking should be stored and handled according to the supplier's instructions before installation.
- Store boards flat on evenly spaced supports.
- Keep bundles protected from contamination and uncontrolled movement.
- Avoid supporting long boards only at their ends.
- Do not drag finished surfaces across the ground.
- Allow the decking to reach suitable site conditions before final cutting and fixing.
- Record the installation temperature when required.
- Keep different colors and production batches clearly separated.
22. Follow A Controlled Installation Sequence
- Confirm the structural substrate, deck height, drainage direction and finished layout.
- Approve the solid WPC decking profile, joists, clips, screws and edge accessories.
- Set out joists according to the approved center-to-center spacing.
- Add double joists, perimeter support, blocking and stair support where required.
- Check that the joist surface is level and that drainage paths remain open.
- Install starter clips or the approved first-board fixing method.
- Position the first decking board accurately and confirm alignment.
- Install hidden clips without over-tightening.
- Maintain required side, end and perimeter clearances.
- Check board gaps and surface level continuously during installation.
- Complete fascia, stairs, picture-frame borders and fixed-boundary details.
- Clean the deck, remove debris below the boards and complete final inspection.
23. Common Installation Problems And Causes
| Problem | Possible Cause | Recommended Prevention |
|---|---|---|
| Decking Feels Soft | Joist spacing is too wide or joists are unstable | Use profile-specific support spacing and a stable substructure |
| Boards Bow Upward | Restricted expansion or fixed perimeter conditions | Maintain end and perimeter clearances |
| Board Ends Move | Insufficient end support or incorrect butt-joint fixing | Use dedicated support and separate fixing points |
| Gaps Become Uneven | Incorrect clips, damaged grooves or misaligned joists | Approve the complete fixing system and check alignment continuously |
| Standing Water Below Deck | Joists block drainage or perimeter fascia is fully closed | Design open drainage paths and ventilation |
| Clip Groove Cracks | Over-tightened screws, brittle board edge or excessive movement | Control tightening and verify groove compatibility |
| Fasteners Corrode | Unsuitable screw material for the environment | Select project-appropriate corrosion resistance |
| Deck Surface Is Uneven | Joists are not level or have inconsistent dimensions | Correct the joist plane before installing decking |
24. Calculate Joists And Accessories Before Ordering
Joists, clips and screws should be calculated according to the actual deck layout rather than using only the total square-meter area.
| Material | Calculation Basis |
|---|---|
| Main Joists | Deck dimensions and approved center-to-center spacing |
| Double Joists | Total number and length of board-end butt joints |
| Perimeter Framing | Deck edges, fascia and picture-frame requirements |
| Hidden Clips | Number of board-to-joist intersections |
| Screws | One or more screws per clip plus installation allowance |
| Starter Clips | Length and joist intersections of the first and final board edges |
| Fascia Boards | Total visible perimeter length plus cutting allowance |
25. Installation System Purchase Checklist
Information Buyers Should Confirm Before Production
- Solid WPC decking profile and cross-section drawing
- Board width, effective width, thickness and length
- Board weight per linear meter and square meter
- Project application and expected traffic
- Decking installation direction
- Joist material, dimensions and structural function
- Approved center-to-center joist spacing
- Reduced spacing for diagonal installation
- Double-joist requirements at butt joints
- Perimeter, stair and picture-frame support
- Hidden clip dimensions and material
- Starter and finishing clip requirements
- Screw type, length and corrosion resistance
- Installed side gap created by the clip
- End-gap guidance for different temperatures and board lengths
- Perimeter clearance around fixed objects
- Drainage direction and ventilation requirement
- Fascia and edge-finishing details
- Installation manual and technical drawings
- Pre-shipment accessory and assembly inspection
Common Questions From Solid WPC Decking Buyers
Joist spacing should be based on the exact decking profile, board thickness, installation direction, project load and supplier performance data. One spacing value should not be applied to every product.
Not automatically. Solid construction alone does not confirm the permitted span. Profile-specific load and deflection information should be reviewed.
Double joists can provide separate support and fixing locations for each board end while maintaining the required end clearance.
It commonly requires additional support because the boards cross the joists at a longer effective span. The final layout should be confirmed for the selected product.
The required gap depends on board length, installation temperature, expected climate and product expansion data. Follow the technical instructions for the exact decking profile.
Decking boards should normally be supported by an approved joist, batten or pedestal system that provides fixing, drainage and ventilation. Direct board contact with the slab may not provide these functions.
Only when the exact joist product is designed and verified for that structural span. Some WPC joists are intended only as battens over a continuously supported surface.
Excessive tightening can deform the clip, damage the decking groove, create uneven gaps and restrict normal board movement.
Yes. Proper airflow and drainage help reduce heat, moisture and debris accumulation beneath the decking system.
Complete Solid WPC Decking Installation System Supply
We supply solid WPC outdoor decking with compatible joists, hidden clips, starter clips, screws, fascia boards and installation accessories for distributors, contractors, landscape companies and commercial projects.
Send us your deck dimensions, project application, substrate condition, installation direction, selected profile, destination climate and expected traffic for joist-layout recommendations, accessory calculation and wholesale pricing.
